Espresso Shot Troubleshooting Guide - How To Make The Perfect Espresso
- 15 Oct 2020
How do you make the best coffee consistently? Many baristas make ristrettos to grab the best part of an espresso shot. But, you can't make great tasting espressos or ristrettos until you can consistently drop the perfect espresso shot. And with variations in coffee beans, grinder adjustments and brewing techniques, it can be difficult to maintain the quality of your espresso shots without keeping an eye on the finer details as you go. So to help out, here's how to troubleshoot your espresso shots so you can be confident you're making the best coffees time and time again...
BARISTA TOOLS YOU'LL NEED
1x Set of scales that will fit an entire group handle/ dosing cup on it
1x Timer so that you can time your espresso shots (phone will do)
1x Calibrated tamp, or practice getting your tamping pressure consistent beforehand with your standard tamp.
You can do this by using a set of scales that will register loads of 10kg or more (If you have a kitchen on site, ask the chefs for one). Press down on the scales with your normal tamp until you get a pressure of between 10-15kgs, this is the acceptable tamping pressure range.
DIAGNOSING YOUR ESPRESSO SHOT
To diagnose your espresso shot, you'll need to use a double spout group handle, and pour a 60ml double shot each time. Double shot espressos will give you the most accurate indication of how the shots are pouring, and once fixed all other smaller volumes will also pour correctly.
Step 1: Pack a shot as you normally would, and time your shot. Press the ‘start’ button on your timer (a stopwatch in the clock function on your smartphone will work fine if you don’t have a timer handy) at the same time as pressing the double shot button on the espresso machine. There will be a delay between pressing the button on the machine, and espresso beginning to pour out. This is normal and the shot should be timed from the moment the button on the machine is pressed. When the espresso shot finishes hit the ‘stop’ button on your timer. Write that time down somewhere or using the table we have provided for you below.
Step 2: Pack a second shot as you normally would and time your shot. Write that time down somewhere or using the table below.
Step 3: If your double shots are running outside the ranges of 27-35 seconds, an adjustment will need to be made.
ADJUSTMENT STEPS
STEP 1: THE COFFEE DOSE is the first thing to check. Are you putting the right amount of ground coffee in your basket? Are you failing to be consistent in your dosing?
You can check your dose using some scales and your group handle. Place the group handle on the scales and TARE it off so the scale reads zero. Then load your group handle (don’t tamp) as you normally would and place it back on the scales. Write down the number of grams the scale is reading somewhere or using the table we have provided for you at the bottom of this page. Use this table to keep track of changes to your extraction/shot times, between changing the dose, tamp or grind.
If you are unsure of how many grams of coffee should be going into your basket each time or how to pack it, please contact us at Crema Coffee Garage and we can advise you on this.
STEP 2: TAMP is the second thing you'l need to check. Are you tamping too lightly or with too much pressure? Are you tamping differently each time? Are you tamping unevenly?
If you have a calibrated tamp, make sure you press down hard enough to feel the ‘click’. Be careful not to keep pressing down once you feel the ‘click’.
If you have standard tamp, the recommended tamping pressure is between 10-15kg, and you can test out how much pressure you are putting on the tamp manually. To do this you will need a set of scales that will measure 10 kilograms or more. Bodyweight scales will work fine, just put them up on the bench. Press your tamp down on the scales until you seen 10kg pop up and ask yourself – how does that feel? Does it feel normal to you, or do you think you have been tamping to hard or too soft?

STEP 3: COFFEE GRIND – If your dose and tamp are consistently accurate, the remaining reason that your shots would be pouring too fast or too slow is because the coffee is not being ground at the ideal size.
If coffee shots are pouring shorter or faster than 27 seconds, your grind needs to be made finer (smaller granules). If your coffee shots are pouring longer or shorter than 35 seconds, your coffee grind needs to be made coarser (larger granules). The space between the coffee grinds in your basket must be altered to allow the right amount of space for water to pass through between 27-35 seconds.
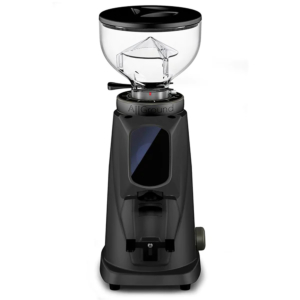
To adjust your grind size, you will need to move your coffee grinder's adjustment collar in the appropriate direction (follow the signs on your grinder which tell you which was is coarse or fine) depending on whether your shots are fast or slow. Be careful to only adjust the collar small amounts at a time (one notch at a time) to avoid over-adjusting (if you do accidentally go too far in one direction, you can always move backwards). As general rule of thumb, adjusting the grinder by one notch may vary the espresso shot time by around about 5 seconds. Click here for a full guide on how to adjust your coffee grinder.
It's important to remember that grinder must be TURNED ON whilst the collar is moved to avoid jamming the blades. Once the adjustment collar has been moved, grind out and discard around 40g of coffee (1.5-2 double baskets’ worth) to ensure there is no ‘old’ grind size remaining in the grinder. This is to make sure the next shot you pack is all the adjusted grind size, giving you an accurate result. TIP: Keeping this disgarded coffee in the cupboard for use when you need to season your machine after performing a machine cleaning will save you a lot of waste.
Next, proceed to dose, tamp and time your next 60ml double shot. You should see a change in shot time that aligns with the change you made.
For example: If you had fast coffee shots, and you made the grind finer (assuming your dose and tamp are correct) – you should see your shot time slow down.
If the result you get is the opposite of what you expected, and instead you got a faster shot – or no change – check your dosing and tamping before making another adjustment. Also check that you turned the collar in the right direction. In the minority of cases, sometimes your particular grinder may need larger adjustments (2-4 notches) to make a noticeable adjustment – but this is definitely the exception to the rule.
Keep repeating the process of changing the grind, keeping your dose and tamp stable, until you get a good 60ml extraction time.
This may only take one adjustment, but in some cases can take many more depending on how far the settings are off.
If you have an electric grinder, make sure to check that changing the grind size has not also changed your dose. If it has, increase or decrease the time it grinds for until it matches your original dose. The easiest way to manage this adjustment process from the very start is by manually/self-dosing whilst changing the grind to keep the dose stable. Once a good extraction time has been achieved, make sure the automatic dose matches your manual/self-dose. This may take a small amount of trial & error to get the seconds of grind time right.
WHY COFFEE GRINDERS GO OUT OF ADJUSTMENT
Wild swings in weather and accidents such as correcting a grinder jam/ staff members with no training fiddling with it/ the collar being moved during cleaning, and going long lengths of time between adjustments (weeks instead of days) can be causes for the grinder to be significantly off it’s ideal settings.
WHEN TO CHECK YOUR ESPRESSO SHOTS
Ideally, your 60ml extraction time should be checked before you start making coffees for the day (whilst seasoning the machine) to give you an opportunity to have it running perfectly without the distractions of having to serve customers.
The extraction time should be checked when you refill the coffee grinder at home, or regularly throughout the day in a cafe environment, at least once an hour and when you notice they have started to run differently. Upon checking, if you find they are running outside the acceptable range of 27-35 seconds, make an adjustment.
It is normal and best practice to be making a grind adjustment at least a few times a day in a cafe, and more on days where the weather is fluctuating or a bag of coffee from a different roast date is put in the grinder.
It is also normal to have shots that run at different times, as long as those shots are all mostly falling in the range of 27-35 seconds. Even with our best efforts - dosing, tamping and grinding will have tiny fluctuations which result in tiny time differences.
Do not make an adjustment to your process or grinder based on one shot that runs badly, if all others are running in range. In the speed of service, there are always going to be a few shots that are badly put together. If a bad shot is an outlier, and not part of a trend of bad shots, simply toss it away and continue service.
However, if all the shots are starting to run a little faster or slower – It’s time to time them and make an appropriate adjustment.
And don’t forget – if you try all of this and/or you need guidance on the process, you can always call us here at Crema. We have professionals who can talk you through it over the phone, train you in a class or assist you at your business if you are a wholesale commercial client.